Archer 2.0

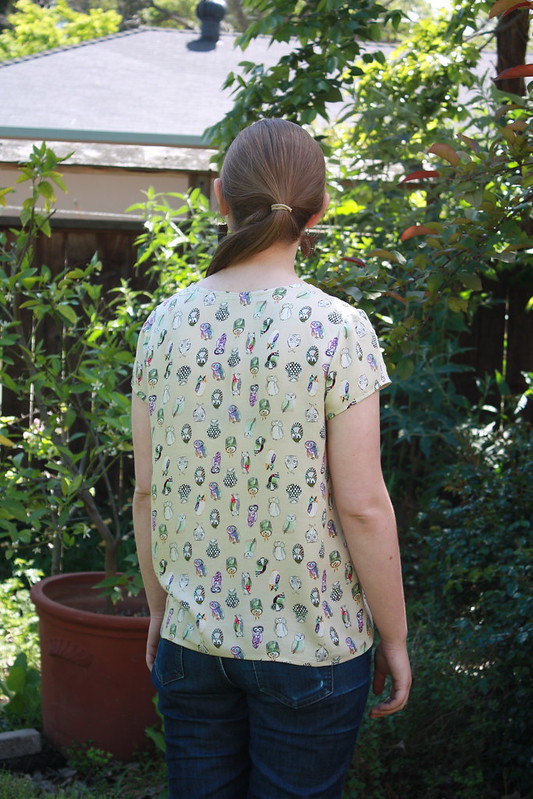
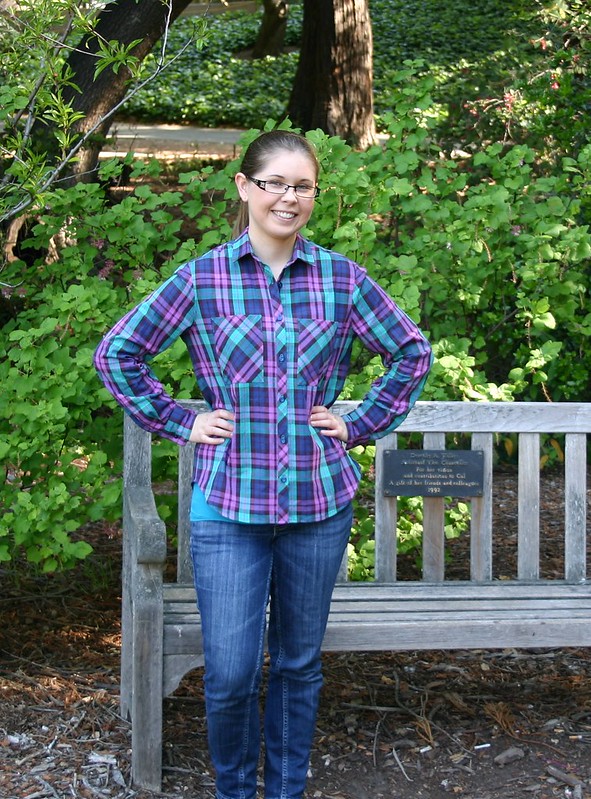
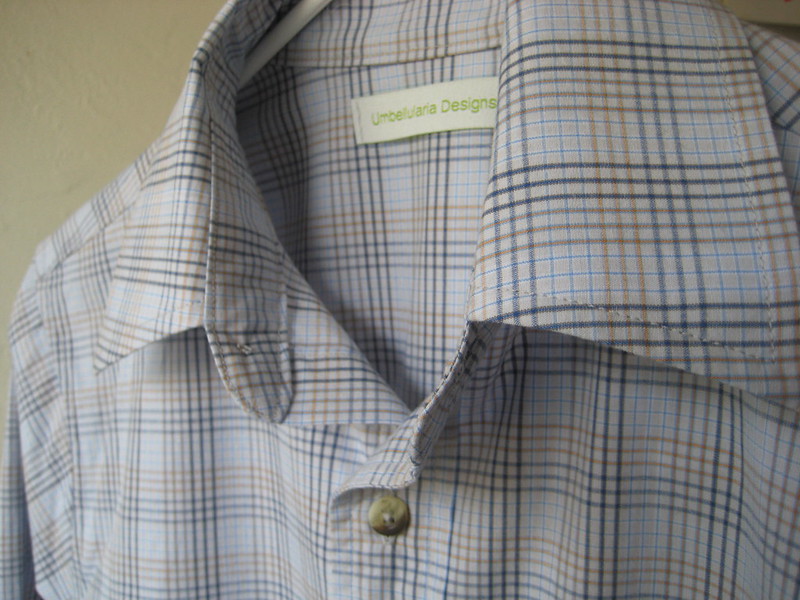
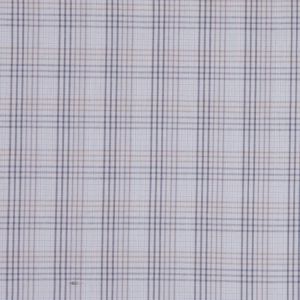
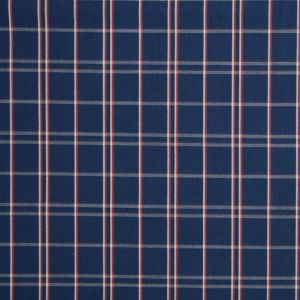
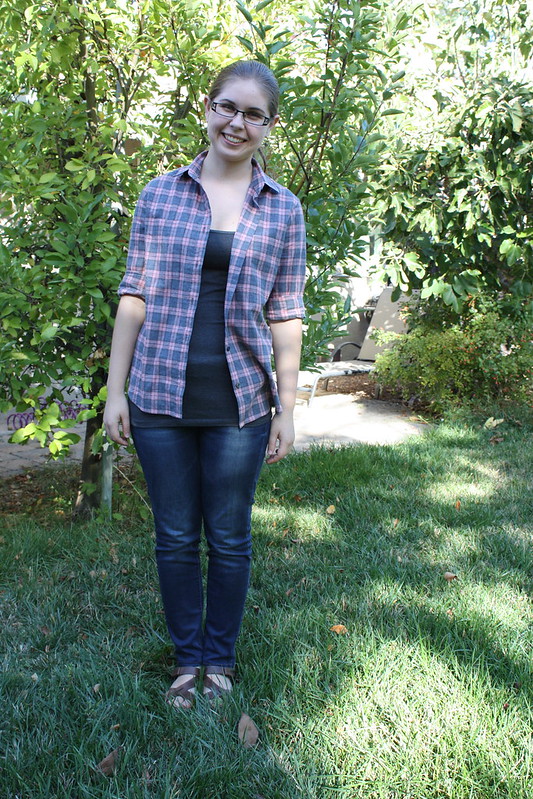
I made another plaid shirt!

IMG_1582

Of course it’s another Archer. Do you even need to ask?

IMG_1575

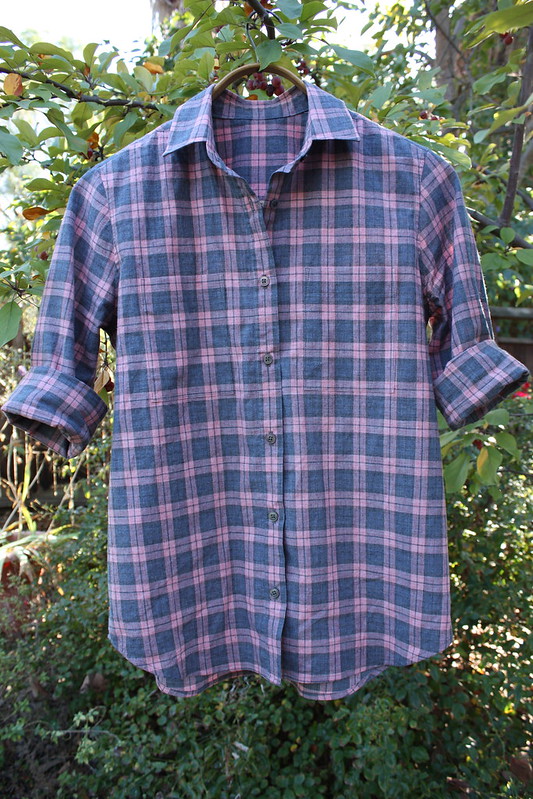
The first Archer I made turned out a little boxier/looser than I wanted, so I cut one size smaller this time (a 4 instead of a 6). (To be fair, though, my first Archer has shrunk just enough, after multiple washings, that the fit is pretty great now. I’m going to be more careful about not shrinking this one too much!)

IMG_1572

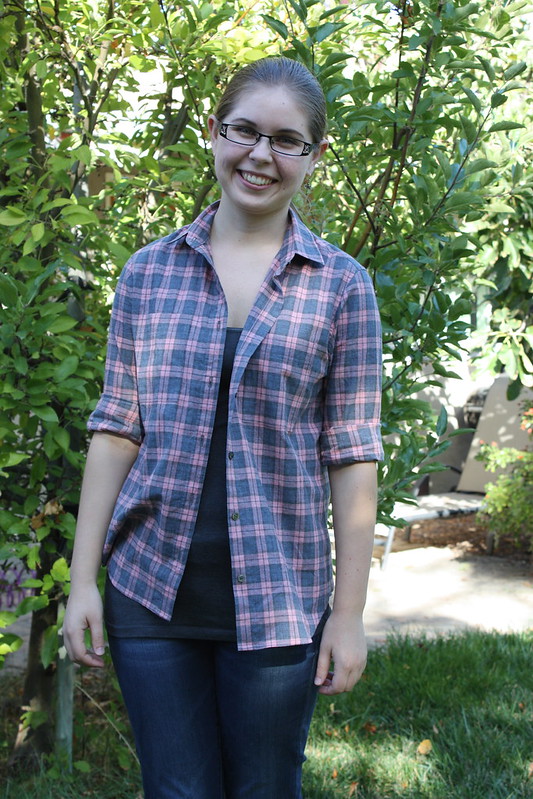
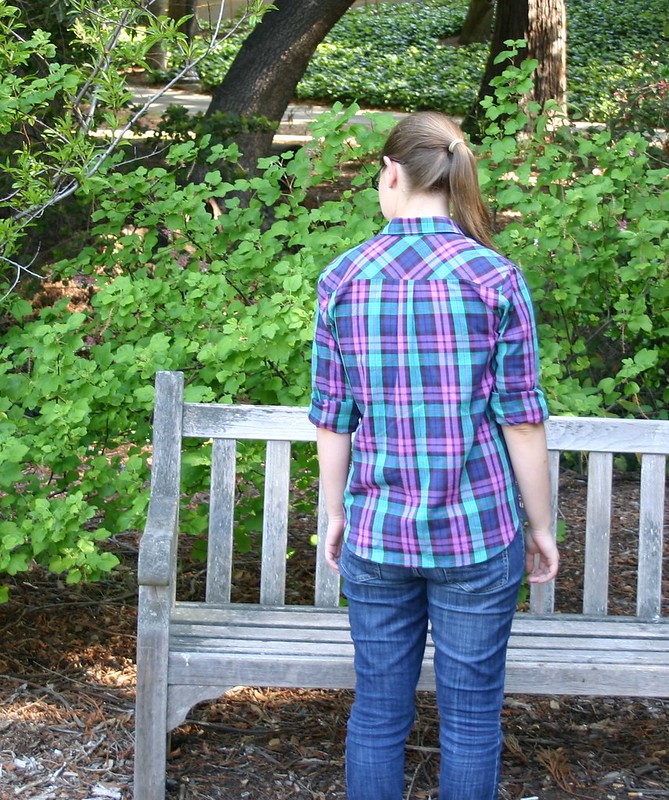
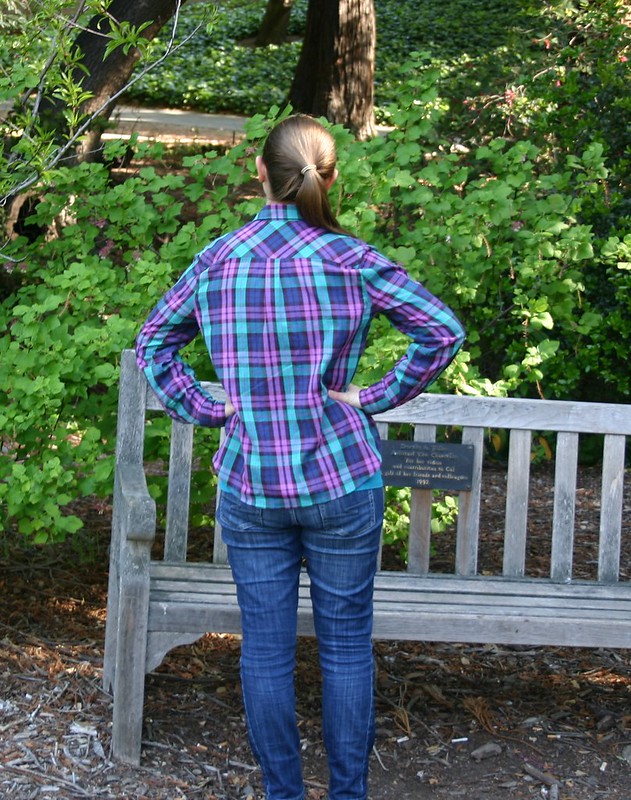
Pattern modifications: narrowed the shoulders by about 1/2″, added 1/2″ of length at the lengthen/shorten line, added ~1/4″ of width on each side of the back at the hips tapering to nothing at the waist, graded down to a 0 at the cuffs, shortened sleeves by some amount that I don’t remember offhand. I think I may have overdone it on the sleeve-shortening, but I wear my button-ups with the sleeves rolled up 98% of the time anyway, so it’s all good.

IMG_1566

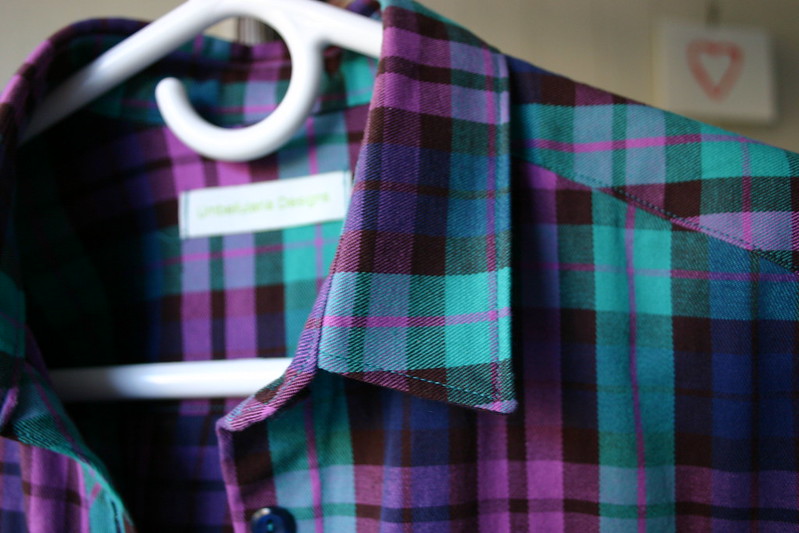
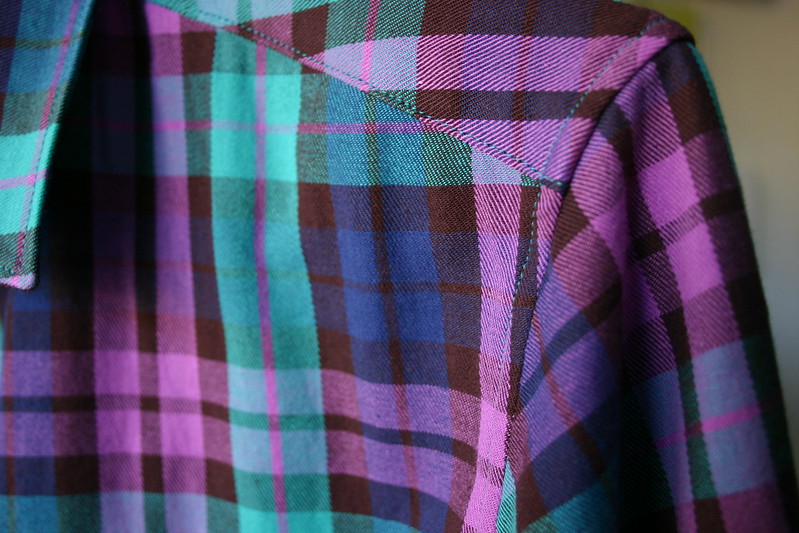
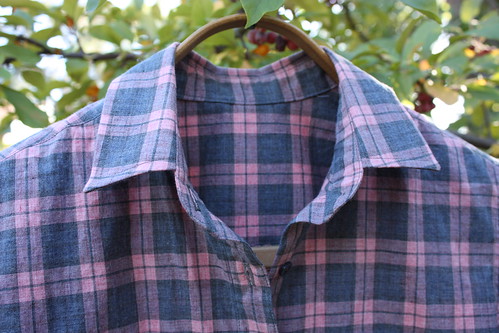
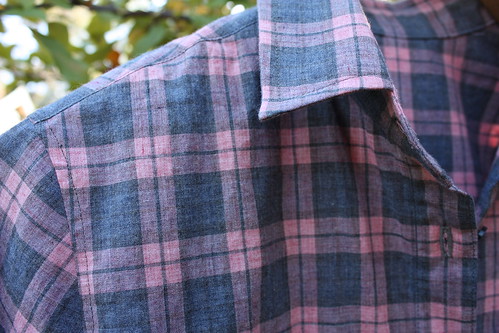
Want to know what part of this make I’m proudest of? Here, let me show you:

IMG_1579

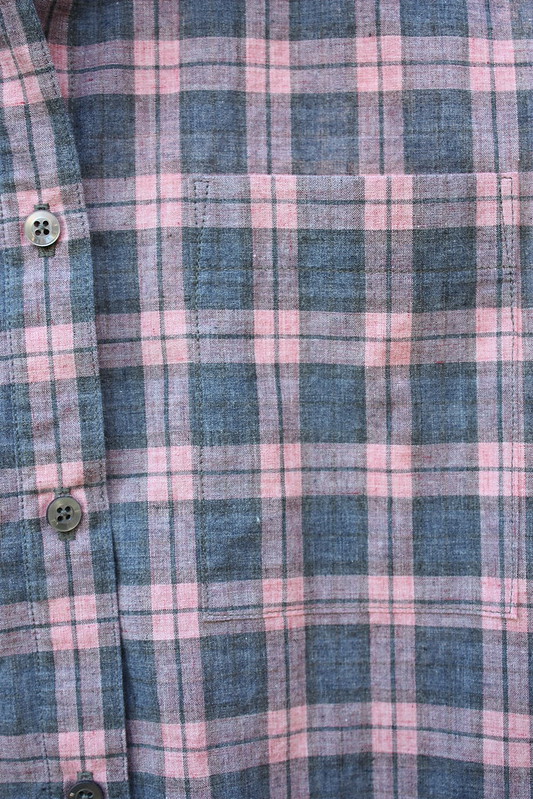
See the pocket? NO? WELL THAT’S BECAUSE THE PLAID-MATCHING ON THAT SUCKER IS PRETTY PHENOMENAL, if I do say so myself, and I am super proud of it. Which I realize is kind of weird because, you know, it’s really hard to see from far away, so probably no one will ever notice it. Whatever. I know it’s there, and it makes me happy.

IMG_1570

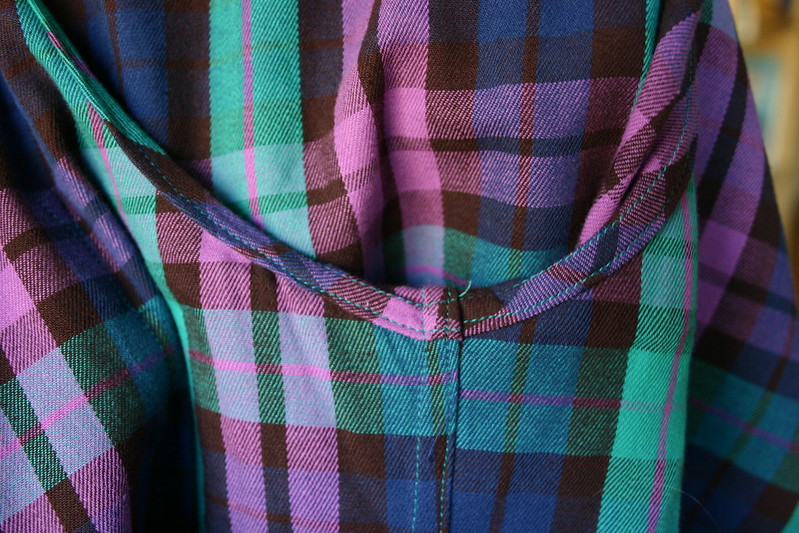
I noticed one weird thing while I was cutting those pocket pieces–I think the pocket piece is drafted with 1/2″ seam allowance, when it’s supposed to have 1/4″ seam allowances (according to the directions). If you cut the pocket piece as drafted and turn under 1/4″, the finished pocket ends up being wider than the pocket placement line indicates the pockets should be. Not a big deal at all, but something that I noticed and was briefly confused by when I was trying to figure out how to match the plaid on the pockets and the shirt fronts. (It’s also entirely possible I messed up somehow, so take all that with a grain of salt.)

IMG_1586

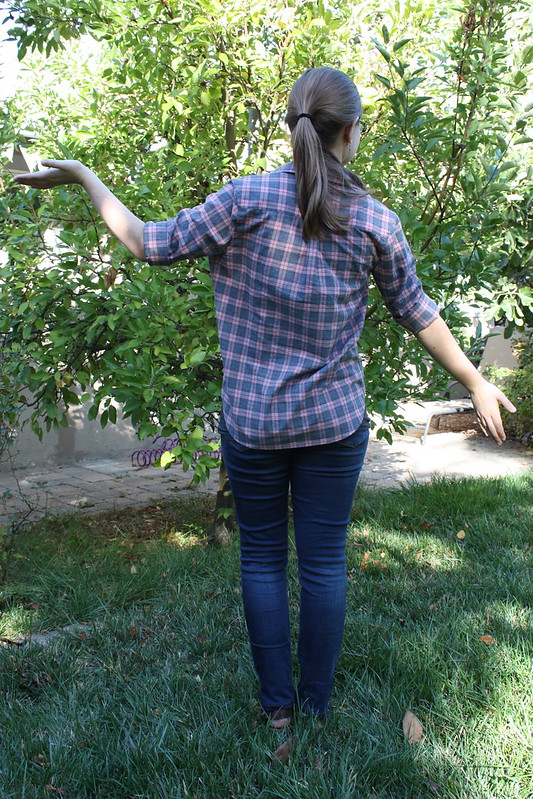
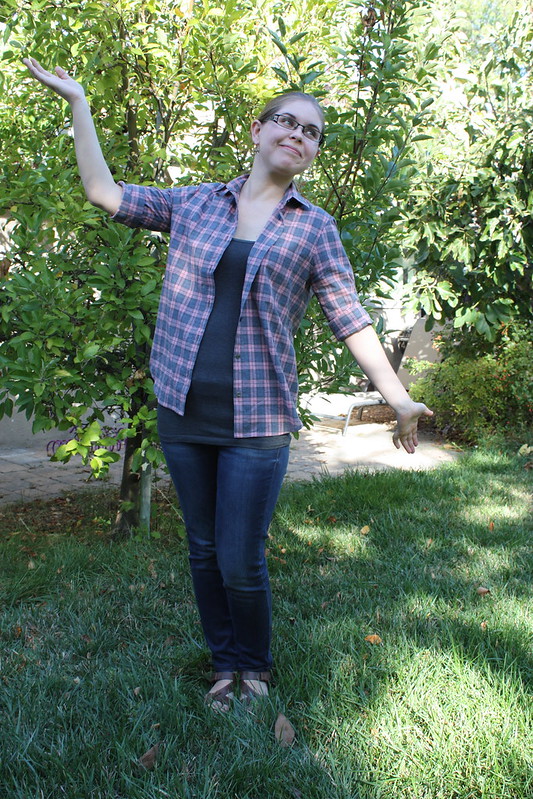
Other than that, it came together really nicely. I’ve been wearing it tons since I finished it last month–if that’s not the sign of a successful make, I don’t know what is.

IMG_1567

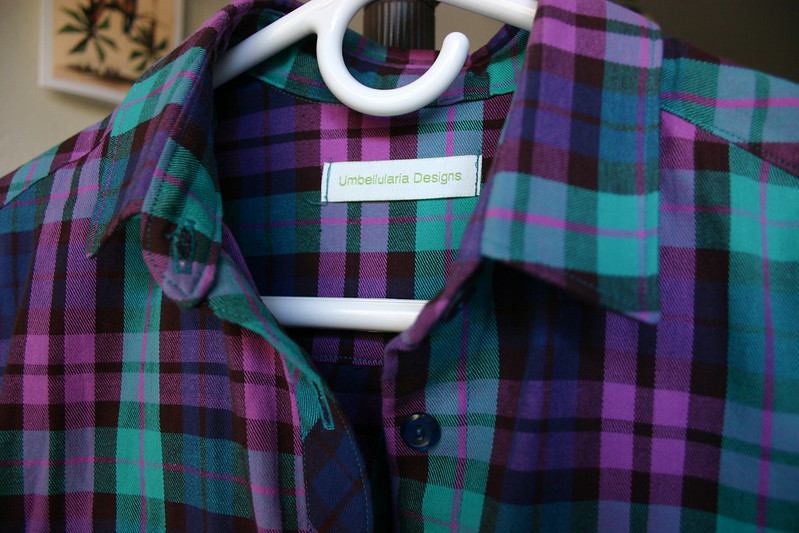
P.S. I realized recently that I never got around to sewing a “Umbellularia Designs” tag into this shirt! Must fix that soon. :)

Owl Print Scout Tee

I made a Grainline Studio Scout Tee!

IMG_1486

And it has adorable owls on it. LOOK:

IMG_6552

Is that not the cutest print you’ve ever seen?

IMG_1475

I really, really like this pattern. It has only four pattern pieces (three, if you don’t count the neckline binding), so cutting it out is super quick. It goes together really easily too. It took me a couple evenings to put together, but that’s only because I decided to be fancy and do French seams everywhere. If you didn’t do that you could totally make it up in one session.

See? Fancy insides.

IMG_6559

I also really like this rayon fabric (from Stone Mountain and Daughter Fabrics). It feels very light and flowy. It does wrinkle pretty easily, but I can put up with that.

IMG_1492

And a back shot:

IMG_1484

This is definitely a winner–I’ve worn it several times already, and I only finished it a few days ago! The only change I made to the pattern was to lengthen it by 1/2″; otherwise it fit perfectly as drafted.

There will definitely by more Scouts in my life soon. :) (First I have to finish my current work in progress, the Portrait Blouse from Gertie’s book, and then I have to make a dress to wear to a friend’s wedding in June… But after that, more Scouts!)

Another plaid shirt (for me this time!)

I finally made an Archer shirt! I think I’m the last sewing blogger in the world to make this pattern, but better late than never.

IMG_6512 - Version 2

The pattern went together fairly easily. I think having just made two button-up shirts for The Boyfriend helped a lot, since I was already familiar with the techniques for attaching the collar and cuffs. The only other tricky part was inserting the sleeve plackets (the technique used in the Archer pattern is completely different from the plackets I’ve made on previous shirts), but once I figured it out it wasn’t that difficult.

IMG_6531

I made a size 6 with a few tweaks. I graded down to a size 0 at the cuffs (either I have extremely skinny wrists, or the cuffs are designed to fit much more loosely than I prefer–could be a bit of both). I also added just a tiny bit (maybe 1/2″) to the hips, just on the back, which seemed to help the back lay flatter.

IMG_6514

I also shaved off about 1/4″ from the top of the armhole to narrow the shoulders a little bit (I think the shoulders are designed to be slightly dropped and loose-fitting, but I wanted the shoulder seams to fall on my actual shoulders). I’m sure there’s a more “correct” way of doing a narrow shoulder adjustment, but this seemed to work fine. I didn’t alter the sleeve-caps themselves at all (the top part of the sleeve that gets sewn into the armhole); the pattern is designed so that there is some ease in the sleeve-caps, so making the armhole slightly bigger by narrowing the shoulders isn’t really a problem.

IMG_6543

I can’t decide if I should go down to a size 4 for my next Archer or not (because there will definitely be a next Archer!). I know this is supposed to be a loose-fitting shirt, but I think I might prefer a slightly slimmer fit. It looks fine when I’m wearing it unbuttoned (which, to be fair, is probably how I’ll wear it 90% of the time), but when it’s buttoned up it looks pretty boxy on me.

IMG_6524

Next time I might go for a size 4, but with the length of a size 6 (or even a tad longer). Next time I’ll also shorten the sleeves just a tad–maybe 3/4″ or so. I’ll probably mostly wear this with the sleeves rolled up, so the length isn’t a big deal, but these sleeves did turn out a little long on me. (From reading other blogs, this seems like a pretty common occurrence with this pattern.)

IMG_6529

The fabric is from Denver Fabrics, and it was marketed as flannel…but it clearly isn’t. It’s not the least bit fuzzy. But it does seem to be cotton and it’s fairly soft and has a tiny bit of stretch, so it worked out just fine. I quite like it!

IMG_6535

I’m pretty proud of the workmanship (workwomanship?) on this. I flat-felled all the seams, so it’s just as neat on the inside as it is on the outside.

IMG_6539

Overall, I’m really pleased with how this turned out! Can’t wait to make my next one–I have some super soft flannel in my stash that’s just calling out to be made into an Archer. :)

IMG_6509

Blue Plaid Shirt

It’s finished! Finally!

IMG_3483

Plus, since it’s blue, it counts for Blue February, and since it’s a button-up shirt, it counts for It’s On Like Donkey Kong’s Shirt, too. Two birds, one stone, etc.

This is the second button-up shirt I’ve made (you can see the first one here). This one is from the same self drafted/draped pattern as the first shirt (made to fit The Boyfriend). (For more info on the initial pattern-making process, check out this post.) I haven’t yet had a chance to snap some photos of The Boyfriend actually wearing it, but I can report that it fits quite nicely and he seems to like it (he’s even worn it to work a couple times)!

This shirt still has some issues, but on the whole I’d say it’s an improvement over the first one. I definitely felt more comfortable with the techniques this time around, and I also lengthened the sleeves a little bit to improve the fit.

IMG_3468

I think the collar turned out pretty well! I still haven’t settled on a collar shape I’m entirely happy with, though; this one is just slightly wider and pointier than I was envisioning. I’m content with it, though. I’ll just have to do some more experimenting the next time I make a shirt. (Anybody know any good resources that talk about the fine points of different collar shapes? They really make a huge difference in how a finished shirt ends up looking, I think.)

IMG_3476

The cuffs came out well too, I think. Look at that even edge stitching.

IMG_3473

I’d also like to reduce the fullness in the sleeves a little bit on the next one — I think two pleats instead of the current three (where the sleeve is sewn to the cuff) would be about right.

IMG_3481

I’m basically happy with it, though. Not bad for a second-ever attempt at a men’s shirt!

I would also like to draw your attention to the fact that the plaid matches perfectly (horizontally and vertically) at the center front. (This is much easier to achieve when your fabric isn’t stretched off grain, let me tell you…) They match at the sides too, but you’ll just have to take my word for that.

IMG_3479

I’m happy to finally have this finished; shirt-making is really satisfying, but also pretty exacting and fiddly. I’m looking forward to sewing up a few less complicated garments for myself at this point! :)

Blue Batwing Top

IMG_3441

I made another knit top! (Also, my mom gave me a set of 100 of these awesome-sauce labels for Christmas, and I freaking love them. They look so professional! I’m putting them in everything I make from now on, haha.)

IMG_3431

I drafted this pattern myself (if you can even call this drafting–it was incredibly simple). It’s based on a RTW (ready-to-wear) top I already own and like, with a few simple modifications. I raised the neckline quite a bit, and made my version longer, for a more tunic-y effect.

IMG_3436

IMG_3433

IMG_3435

This fabric is amazing and gorgeous. I wish a remembered the fiber content, but I don’t. All I know is that I found it in the sweater knit section at Stone Mountain and Daughter and decided I had to have it. It’s incredible drapey and soft (and also slightly see-through, so this is definitely in the “only wearable with a cami underneath” category, but that’s okay).

IMG_3452

Construction was simple. I used a normal narrow zig zag (width 1.5, length 2.5) to sew the seams. I used French seams on the side seams and shoulder seams, to enclose the raw edges (I wanted the inside to look nice and clean, since the fabric is slightly sheer). I used the overcasting stitch on my sewing machine to finish the seams attaching the neck band, cuffs, and hem band, and then zig-zagged those edges in place so they would roll the right direction. (I used this tutorial for the Hemlock Tee from Grainline Studio to figure out how to attach the neck band.)

IMG_3434

Here’s the inside of the hem band:
IMG_3459

The outside of the hem band:
IMG_3451

The inside of the neck band, with a shoulder seam:
IMG_3456

A cuff:
IMG_3454

I’m really happy with how this turned out.

IMG_3447

It’s super comfy, and I love that it looks good both with jeans and tucked into skirts. See? (Disclaimer: I did NOT make that pencil skirt. It’s just for demonstration purposes!)

IMG_3426

IMG_3430

I know I’ll get lots of wear out of this, and I’m already looking forward to making more batwing tops in cozy knits. :)

On a different topic: I’m participating in my first official Sewcialist project with other sewing bloggers! We’re going to be sewing button down shirts together, sharing tips, advice, and inspiration as we go. Check out the website for the project here: http://itsonlikedonkeykongsshirt.tumblr.com.

Edited to add: I’m also going to try to follow along with the Wardrobe Architect project over on the Coletterie blog. Yay!

Cranberry Renfrew

I made my first Sewaholic Renfrew top! I can see why everyone raves about this pattern so much; it really is pretty excellent.

IMG_3390

I’m so pleased with how this turned out. It’s super cozy, and it looks quite nice too!

IMG_3391

This pattern is very well drafted and went together very easily. I made view C, with the cowl neck and 3/4 length sleeves. Tasia’s instructions are, once again, fabulous, and give the shirt a very neat and professional finish. I especially love that you can easily make this top using either a regular sewing machine or a serger (or a combination of the two). I made the whole thing with my sewing machine.

IMG_3407

I finally learned how to use my machine’s overcasting stitch to finish my seam allowances. I think it looks pretty good!

IMG_3414

Mainly for my own information, since I will inevitably forget this and have to look it up when I go to make my next Renfrew (and there WILL be a next Renfrew, this pattern is THAT good), I sewed the seams with a regular zigzag stitch with length 1 and width 2, and finished the seam allowances with the overcasting stitch using whatever the automatic length and width are for that stitch on my machine.

IMG_3416

The pattern calls for twill tape to stabilize the shoulder seams, but I didn’t have any on hand. I used some sturdy ribbon I happened to have in my stash instead, and it worked perfectly. I kind of like having this secret bit of green on the inside, too. :)

IMG_3396

I cut a straight size 10 based on my upper bust measurement, and it fits pretty well! I didn’t even take in the hips, except for sewing the bottom hem band with quite generous seam allowances to tighten it up just a little. The fit from the waist down did turn out slightly more relaxed and slouchy than I was envisioning, but I don’t actually mind–it’s definitely comfy, and I think it looks okay. I think I might try a size 8 next time though (maybe even grading down to a 6 below the waist), especially if I make a non-cowl-necked version where neckline gaping might be an issue… We’ll see.

IMG_3386

The only substantial adjustment I made was to tighten the cuffs quite a bit. I don’t know if I just have skinny arms or what, but they were kind of ridiculously loose on me as drafted. Taking them in was super easy though, so no big deal.

IMG_3393

I love this fabric too. It’s from Stone Mountain and Daughter, and it’s a lovely, warm, cranberry red color. It’s super soft, too. I don’t actually remember the fiber content, but I have a feeling it might be bamboo or something–it feels softer and smoother than cotton.

IMG_3388

Overall I’m really happy with this make. I see many more Renfrews in my future! Must get my hands on some more cozy knits… :)

——-

Oh, also: I finally got around to making an account on Bloglovin’ and claiming my blog over there… So now you can follow me over there if you want to!

Follow my blog with Bloglovin

Shirtmaking #2: The finished shirt (finally)!

Guys? Guys. I made a shirt! From a pattern I drafted myself!

IMG_3269
I’m pretty excited.

IMG_3282
Check out that beautiful flat felled side seam and narrow hem (this photo is of the inside of the shirt).

Is it perfect? Goodness no. It has some issues, for sure. But for a first attempt, I’d say it was a success.

IMG_3280
More pretty flat felled seams. This is where the side seam and armhole seam meet (again, on the inside of the shirt).

Most importantly, The Boyfriend likes it. :) I can tell because he’s worn it several times, with no convincing from me. He actually wore it to work the day after I finished it!

IMG_3305

IMG_3309
(As usual, excuse the terrible photography. If I get some better shots of the shirt in action soon, I’ll post ’em.)

I’m still debating whether to add pockets. And if so, with or without pocket flaps. Opinions?

Anyway, here are the gory details:

1. The custom pattern drafting/draping methods in David Coffin’s book really do work. I was pleasantly surprised at how well this ended up fitting! There are a few tweaks I want to make next time, though — mostly lengthening the shirt body a little, lengthening the sleeves, and making the cuffs a little narrower (I had to make these cuffs wider than I planned after discovering I’d cut the sleeve pieces a little too short).

IMG_3273
The sleeve plackets turned out pretty well though, if I do say so myself.

2. This fabric is really nice and soft, but cutting it out was a royal pain. I don’t know if it was this way when it arrived from Mood, or if it somehow got stretched out when I pre-washed it, but the vertical and horizontal stripes were not at perfect right angles to each other. They are woven stripes, not printed, but somehow the warp and weft threads of the fabric just weren’t perpendicular, and no amount of ironing completely solved the problem. This meant that I had to choose which was more important — perfect vertical stripes, or perfectly level horizontal stripes. I chose perfect vertical stripes, but this made matching up the side seams and the center front…difficult. You can see that the front button band didn’t end up matching at the center front perfectly. In hindsight I wish I’d cut it on the bias to avoid that problem. Ah well.

IMG_3293
A view of the collar. Not perfect, but pretty good, I think!

3. Another issue I only noticed after it was too late to fix: I cut the back upside down. That is, the pattern goes the opposite way on the back as it does on the front. I’m somewhat reluctant to bring this up because I honestly don’t think anyone would ever notice if they didn’t already know–it’s practically impossible to tell. But I want to be honest with y’all, so…now you know. Call it a design feature?

4. As far as construction goes, I used a combination of David Coffin’s methods and Peter’s instructions from his men’s shirt sewalong. Peter’s methods are generally simpler and seemed to give perfectly adequate results, so I mainly stuck with those. I’m planning to write up instructions on exactly what I did so I can replicate it all next time. Maybe I’ll post those instructions up here at some point.

IMG_3290
I’m pleased at how this turned out, but also pleased to be done with it. I’m working on a quick and simple project for myself at the moment — sort of a sewing palate cleanser. But after that I’m looking forward to making another shirt, and correcting all the mistakes I made this time!

Have you made a men’s shirt? Any tips? Let me know if the comments. :)

Summer Bathrobe

Remember this?

IMG_3050
I finally completed the project I bought this fabric for. Super simple, but super satisfying (to me, anyway).

Behold: a bathrobe.

IMG_3204
I’ve been wanting to make myself a lightweight summery bathrobe for ages. I have a big fluffy robe that I use in the winter, but it’s way too warm for summer. I wanted something I could throw on after I get out of the shower or while lounging around my apartment on weekend mornings.

IMG_3234
I definitely wanted it to be cotton, so it would dry quickly if I wore it after showering. And I definitely wanted it to be opaque enough that I could walk around my apartment in it without worrying about whether the curtains were open. :P So, I figured this would actually be a perfect opportunity for using a quilting cotton in a pretty print. I mean, more drapey-ness would probably be nice (quilting cottons are usually a little stiff), but it’s just so easy to find pretty quilting cottons, and I don’t normally have much opportunity to use them, so…

IMG_3213
Both of these fabrics are from Stone Mountain and Daughter Fabrics in Berkeley. Being cotton, it wrinkles ridiculously quickly and easily, but normally I really don’t care if my bathrobe is wrinkly, you know? Unless I’m showing it strangers on the internet–then I make sure to iron it. :P

IMG_3221
Anyway, the pattern is Burda 7297. I mostly liked it–it’s pretty simple, which is what I wanted. The topstitching detail at the back is a nice touch, as is the fact that the ties are permanently attached to the robe rather than just strung through belt loops.

IMG_3241
IMG_3242
IMG_3233
The band along the neck and front of the robe is drafted kind of weirdly, though–the pattern piece for the band is just a long skinny rectangle that you sew along the edge of the neck and front pieces. Because there’s no shaping in the band, unless your fabric is extremely drapey, it doesn’t lie flat like it appears to in the pattern envelope photos. It sticks up awkwardly around your neck instead. If I were going to make this pattern again, I would put some thought into how to draft a better front band. For this version, I just took a couple of darts out of the front band at each side of the neck and hoped it would look marginally intentional (please don’t tell me if it doesn’t). This is a bathrobe, after all, not a ball gown. Precision sewing not required.

IMG_3208
Other than that, the only alterations I made to the pattern were to add 3 inches to the length and omit the inner tie (although I may go back and add the inner tie at some point–we’ll see).

I finished the seam allowance with a simple zig-zag. (I do actually own a serger, but it’s currently hanging out at my parents’ house, since I don’t really have room for it here.)

IMG_3243
And I finally learned how to use the “overedge” foot on my sewing machine to do this. It has two little wires that keep the edge of the fabric flat so it doesn’t pucker while you’re zig-zagging it. Genius.

IMG_3244
Also, I am still working away on the button-up shirt for The Boyfriend. After realizing that the commercial pattern I bought was going to have to be significantly altered to fit him, I decided to just start from scratch. So, I draped a custom pattern (!) for him using the method in David Page Coffin’s book, and it seems to have worked like a charm (although I’m still tweaking it a little bit, trying to get the armscye just right). Next up: drafting/copying a pattern for the collar. :)

And last but not least…I’m going to be out of town Saturday-Wednesday, so if you leave me a comment during that time, it may not be posted until I get back. But please don’t let that deter you from leaving me comments, okay? Okay.

Where has all the shirting gone?

Dear readers, for the last several days I have been searching for somewhere to buy attractive and good quality cotton shirting for men’s button-up shirts. It’s been more difficult than I anticipated! Here are the results of my investigations, in case y’all are interested.

Shirting from Mood Fabrics (Click the image to see this fabric on Mood's website.)

Shirting from Mood Fabrics
(Click the image to see this fabric on Mood’s website.)

(And if you just want to see all the fabrics and skip the explanations, here’s the pinterest board I put together. And here’s one for flannel shirt fabrics, if you’re into that.)

Why am I looking for men’s shirting, you ask? I promised The Boyfriend I would make him a button-up shirt for his birthday — partly because it’s hard for him to find ready-to-wear shirts that actually fit him well (he’s quite thin, so even the smallest sizes are usually too baggy on him), and partly because I think it will be a fun challenge for me!

Shirting from Mood Fabrics (Click the image to see this fabric on Mood's website.)

Shirting from Mood Fabrics
(Click the image to see this fabric on Mood’s website.)

I looked for shirting at my local brick-and-mortar fabric store, Stone Mountain and Daughter, but didn’t find much–they have one small bookshelf-sized area devoted to shirting, and none of it really appealed to me. So, to the internet I went!

I started by consulting this post from Peter over at Male Pattern Boldness (which I found while reading through the old posts from the men’s shirt sew-along he hosted a couple of years ago, to pick up tips on shirt construction). The online sources Peter recommends for cotton shirting are Fabric Mart, Gorgeous Fabrics, and Fabric.com. I also checked out DenverFabrics.com.

Most of these had a pretty limited selection, once I filtered out everything that was too loud, too pink, or just too weird for my boyfriend to consent to wear it in public. :P I did find a few that I liked at each of these though. And they’re cheap — most shirtings on these sites were $5-$8 per yard.

Next I check out Britex’s online store. They do have some beautiful shirtings, but they’re 4 or 5 times more expensive than anything else I’d found, which seemed a little ridiculous.

And then, dear readers, I checked out the shirting section online at Mood Fabrics. Holy moly! So THIS is where all the attractive and reasonably-priced shirting went! (And no, I am not being compensated by Mood to write this. :P I wish. Heh.) Here are some of my faves (more are up near the beginning of this post) — most of these are between $8 and $16 per yard, which seems reasonable to me.

Shirting from Mood Fabrics (Click the image to see this fabric on Mood's website.)

Shirting from Mood Fabrics
(Click the image to see this fabric on Mood’s website.)

Shirting from Mood Fabrics (Click the image to see this fabric on Mood's website.)

Shirting from Mood Fabrics
(Click the image to see this fabric on Mood’s website.)

Shirting from Mood Fabrics (Click the image to see this fabric on Mood's website.)

Shirting from Mood Fabrics
(Click the image to see this fabric on Mood’s website.)

Shirting from Mood Fabrics (Click the image to see this fabric on Mood's website.)

Shirting from Mood Fabrics
(Click the image to see this fabric on Mood’s website.)

Shirting from Mood Fabrics (Click the image to see this fabric on Mood's website.)

Shirting from Mood Fabrics
(Click the image to see this fabric on Mood’s website.)

Shirting from Mood Fabrics (Click the image to see this fabric on Mood's website.)

Shirting from Mood Fabrics
(Click the image to see this fabric on Mood’s website.)

Any other good online fabric stores I missed (with or without lots of cotton shirting)? Let me know in the comments. :)

That’s all for today! I’m off to cut out a muslin of Burda 7045. I’ll let you know how it goes!

IMG_3056