Wardrobe Architect (weeks 7 & 8)

More Wardrobe Architect talk today! (See, I haven’t forgotten, even though I am atrociously far behind…)

The Wardrobe Architect

Week 7 was all about prints and patterns vs. solid colors, and figuring out which types of prints we like wearing.

IMG_2711

IMG_6537

I’d say that my favorite and most-worn garments (me-made and otherwise) are about half prints and half solids. I don’t do a lot of print mixing — I tend to pair printed tops with solid bottoms or vice versa, or just go for all solid colors. This made me realize that I could stand to make/acquire more solid-colored blouses and t-shirts for wearing with patterned skirts.

IMG_2710

IMG_2717

In terms of types of prints, I tend to go for organic-looking patterns, florals, and novelty prints. I don’t really care for strong geometric prints on me, except for stripes. Oh, and plaids are really nice for button-up shirts! In this post I’ve included a sampling of prints from my favorite garments and fabric pieces from my stash. I think lately I’ve actually done very well at steering clear of prints that I love the look of on a bolt of fabric, but don’t actually like to wear.

IMG_6552

IMG_2713

Week 8 was all about hair, makeup, and other beauty products and routines. This is an area of personal style I’d like to explore more! I’ve pretty much always had long hair. I like it, but I’d be interested try short hair to see what it’s like.

I’ve only just started dipping my toes into the world of makeup–somehow I missed the memo on this in high school and college. (I’ve found lurking in r/makeupaddicts to be very educational in this regard, by the way.) I suppose my core, essential makeup products at this point are foundation; black mascara; neutral, brown-ish eye shadows; and pinkish lip colors. The amount of makeup I put on really depends on the day. I actually enjoy doing a full face with foundation and everything, but realistically I don’t bother most of the time. (I still need to acquire some kind of really light foundation/bb cream/tinted moisturizer for days when real foundation seems like too much… Recommendations?) As with clothing, if something takes a huge amount of effort to put on or wear, I can’t be bothered most of the time. And that’s fine with me. :)

Me Made May! (And a Portrait Blouse)

It’s May 1st! That means it’s time for Me Made May!

IMG_3518

If you’re not familiar with Me Made May, head over here and read all about it. Basically, it’s a month-long challenge to wear your handmade clothes more often! There are no specific rules (each participant decides on their own pledge), and no winners or losers. The point is to challenge yourself to actually use the garments you create. (And to have fun admiring everybody’s awesome handmade outfits, and show off your own!)

IMG_3514

I signed up at the very last minute (last night!). This is the first time I’ve participated in one of these challenges, so I’m pretty excited. Here’s my pledge:

I, Katie of UmbellulariaDesigns.wordpress.com, sign up as a participant of Me-Made-May ’14. I endeavour to wear at least one garment sewn by me (including re-fashioned garments) at least 3 days per week for the duration of May 2014.

So, without further ado, here’s today’s outfit — including a brand new make. This is the Portrait Blouse, from Gertie’s book.

IMG_3528

I’m quite pleased with how this turned out. I made no alterations except to lengthen it by 3″. I also ended up omitting the zipper (after I’d already basted it in…). I found that I could actually just pull the blouse over my head, and the zipper was making one side hang weirdly (probably because the fabric is quite flimsy).

IMG_3522

Here’s a blurry back shot:

IMG_3512

I especially love this fabric. It’s a rayon challis from Stone Mountain and Daughter Fabrics. It’s incredibly soft, and very lightweight (great for summer!). I still have a little less than a yard left — what should I make with it?

IMG_3533

Get ready for lots of outfit photos for Me Made May. I’ll probably try to do weekly updates — we’ll see how it goes. I’ll also be posting photos to the Me Made May ’14 Flickr group — come check it out and admire all the beautiful handmade clothes! :)

Owl Print Scout Tee

I made a Grainline Studio Scout Tee!

IMG_1486

And it has adorable owls on it. LOOK:

IMG_6552

Is that not the cutest print you’ve ever seen?

IMG_1475

I really, really like this pattern. It has only four pattern pieces (three, if you don’t count the neckline binding), so cutting it out is super quick. It goes together really easily too. It took me a couple evenings to put together, but that’s only because I decided to be fancy and do French seams everywhere. If you didn’t do that you could totally make it up in one session.

See? Fancy insides.

IMG_6559

I also really like this rayon fabric (from Stone Mountain and Daughter Fabrics). It feels very light and flowy. It does wrinkle pretty easily, but I can put up with that.

IMG_1492

And a back shot:

IMG_1484

This is definitely a winner–I’ve worn it several times already, and I only finished it a few days ago! The only change I made to the pattern was to lengthen it by 1/2″; otherwise it fit perfectly as drafted.

There will definitely by more Scouts in my life soon. :) (First I have to finish my current work in progress, the Portrait Blouse from Gertie’s book, and then I have to make a dress to wear to a friend’s wedding in June… But after that, more Scouts!)

Wardrobe Architect (weeks 5 & 6)

I bet you thought I’d forgotten about the Wardrobe Architect project, huh? Okay, you probably didn’t–I don’t think anyone except me thinks about my blog enough to notice that I’ve fallen behind, which in this case is convenient! (If you want to read my previous Wardrobe Architect posts, you can do that here.)

The Wardrobe Architect

Weeks 5 & 6 were all about color. The exercise for week 5 was simply to create a palette of colors that you like and feel good wearing.

This was actually a really useful exercise for me because it forced me to think critically about what colors I think look good on me (as opposed to just what colors I like), something I admit I had never put a lot of thought into before. I found this series of posts (part 1, part 2, part 3) from the blog Into Mind (which I recommend, by the way) really helpful and interesting while I was thinking about this. Apparently, according to the “color seasons” idea, I am a “warm autumn,” or possibly a “warm spring.” Now, I don’t subscribe to the idea that one should feel obligated to cling slavishly to the colors one is “supposed” wear, but figuring out which type you are is an interesting starting place for figuring out which colors you might like to wear.

Figuring out which “type” I am was pretty illuminating for me, actually. I had never really considered before that I tend to look best in warm colors, but now that I have thought about it, I can see it’s totally true. My favorite garments are warm colors, and I can even think of specific cool-toned garments that I don’t wear very often because I don’t think the colors flatter me.

The exercise for week 6 was to organize your color palette into three categories: neutrals (black, cream, etc.), near neutrals (colors you’re comfortable wearing as neutrals, that go with almost anything), and statement colors. So, without further ado, here is mine:

WA_ColorPalette_3

This is a combination of colors I already wear and like, and colors that I’d like to wear more often. I really enjoyed putting it together, and it’s definitely been useful to think about while fabric shopping.

Up next in Wardrobe Architect: prints vs. solids! Also, I just finished a Scout Tee today (and I love it!), so you’ll be seeing that up here as soon as I have a chance to photograph it. :)

Another plaid shirt (for me this time!)

I finally made an Archer shirt! I think I’m the last sewing blogger in the world to make this pattern, but better late than never.

IMG_6512 - Version 2

The pattern went together fairly easily. I think having just made two button-up shirts for The Boyfriend helped a lot, since I was already familiar with the techniques for attaching the collar and cuffs. The only other tricky part was inserting the sleeve plackets (the technique used in the Archer pattern is completely different from the plackets I’ve made on previous shirts), but once I figured it out it wasn’t that difficult.

IMG_6531

I made a size 6 with a few tweaks. I graded down to a size 0 at the cuffs (either I have extremely skinny wrists, or the cuffs are designed to fit much more loosely than I prefer–could be a bit of both). I also added just a tiny bit (maybe 1/2″) to the hips, just on the back, which seemed to help the back lay flatter.

IMG_6514

I also shaved off about 1/4″ from the top of the armhole to narrow the shoulders a little bit (I think the shoulders are designed to be slightly dropped and loose-fitting, but I wanted the shoulder seams to fall on my actual shoulders). I’m sure there’s a more “correct” way of doing a narrow shoulder adjustment, but this seemed to work fine. I didn’t alter the sleeve-caps themselves at all (the top part of the sleeve that gets sewn into the armhole); the pattern is designed so that there is some ease in the sleeve-caps, so making the armhole slightly bigger by narrowing the shoulders isn’t really a problem.

IMG_6543

I can’t decide if I should go down to a size 4 for my next Archer or not (because there will definitely be a next Archer!). I know this is supposed to be a loose-fitting shirt, but I think I might prefer a slightly slimmer fit. It looks fine when I’m wearing it unbuttoned (which, to be fair, is probably how I’ll wear it 90% of the time), but when it’s buttoned up it looks pretty boxy on me.

IMG_6524

Next time I might go for a size 4, but with the length of a size 6 (or even a tad longer). Next time I’ll also shorten the sleeves just a tad–maybe 3/4″ or so. I’ll probably mostly wear this with the sleeves rolled up, so the length isn’t a big deal, but these sleeves did turn out a little long on me. (From reading other blogs, this seems like a pretty common occurrence with this pattern.)

IMG_6529

The fabric is from Denver Fabrics, and it was marketed as flannel…but it clearly isn’t. It’s not the least bit fuzzy. But it does seem to be cotton and it’s fairly soft and has a tiny bit of stretch, so it worked out just fine. I quite like it!

IMG_6535

I’m pretty proud of the workmanship (workwomanship?) on this. I flat-felled all the seams, so it’s just as neat on the inside as it is on the outside.

IMG_6539

Overall, I’m really pleased with how this turned out! Can’t wait to make my next one–I have some super soft flannel in my stash that’s just calling out to be made into an Archer. :)

IMG_6509

Blue Plaid Shirt

It’s finished! Finally!

IMG_3483

Plus, since it’s blue, it counts for Blue February, and since it’s a button-up shirt, it counts for It’s On Like Donkey Kong’s Shirt, too. Two birds, one stone, etc.

This is the second button-up shirt I’ve made (you can see the first one here). This one is from the same self drafted/draped pattern as the first shirt (made to fit The Boyfriend). (For more info on the initial pattern-making process, check out this post.) I haven’t yet had a chance to snap some photos of The Boyfriend actually wearing it, but I can report that it fits quite nicely and he seems to like it (he’s even worn it to work a couple times)!

This shirt still has some issues, but on the whole I’d say it’s an improvement over the first one. I definitely felt more comfortable with the techniques this time around, and I also lengthened the sleeves a little bit to improve the fit.

IMG_3468

I think the collar turned out pretty well! I still haven’t settled on a collar shape I’m entirely happy with, though; this one is just slightly wider and pointier than I was envisioning. I’m content with it, though. I’ll just have to do some more experimenting the next time I make a shirt. (Anybody know any good resources that talk about the fine points of different collar shapes? They really make a huge difference in how a finished shirt ends up looking, I think.)

IMG_3476

The cuffs came out well too, I think. Look at that even edge stitching.

IMG_3473

I’d also like to reduce the fullness in the sleeves a little bit on the next one — I think two pleats instead of the current three (where the sleeve is sewn to the cuff) would be about right.

IMG_3481

I’m basically happy with it, though. Not bad for a second-ever attempt at a men’s shirt!

I would also like to draw your attention to the fact that the plaid matches perfectly (horizontally and vertically) at the center front. (This is much easier to achieve when your fabric isn’t stretched off grain, let me tell you…) They match at the sides too, but you’ll just have to take my word for that.

IMG_3479

I’m happy to finally have this finished; shirt-making is really satisfying, but also pretty exacting and fiddly. I’m looking forward to sewing up a few less complicated garments for myself at this point! :)

#WardrobeArchitect (weeks 3 & 4)

More Wardrobe Architect talk today! Week 3 was devoted to thinking about the shapes of individual garments, and week 4 was all about outfit silhouettes.

The Wardrobe Architect

In week 3 we filled out a questionnaire to get us thinking about which garment shapes we gravitate towards. (Mini, midi, or maxi skirts? Full, A-line, or fitted?) Then, for week four, we used those preferences to come up with outfit silhouettes that fit those preferences. In this case “silhouette” means a formula for an outfit: skinny jeans, a button up shirt, and boots, for instance (which just happens to be one of my go-to silhouettes).

Silhouette 1

Coming up with a collection of the silhouettes you tend to use over and over again can help you zero in on the kinds of garments you’re likely to get a lot of use from, and decide how to spend your precious sewing time! I came up with nine silhouettes that I wear often. I’ll only post a few of them here, but you can check out the rest on Polyvore if you’re interested. (Pay no attention to the colors or patterns of the clothes in these–the point was to focus on shape!)

Silhouette 3

This was actually quite a useful exercise for me. It confirmed that I should really make myself some Archer button-up shirts, if nothing else! More loose, casual tops would be good too (Scout tee-shirts, perhaps?!). And more Renfrews, and maybe a few more versions of my self-drafted batwing top pattern…

Silhouette 5

That’s all for now. The button-up shirt for The Boyfriend is coming along! Hopefully I’ll have a post about that up here soon. :)

#WardrobeArchitect (Weeks 1 & 2)

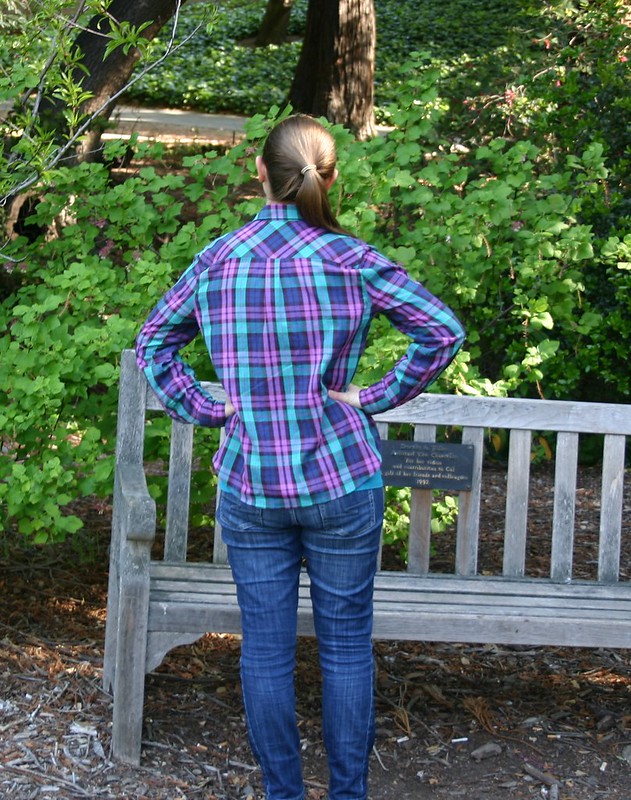
I have no finished garment to show you today. (Sorry–I’m working on it! Next up is another button-down shirt for The Boyfriend.) Instead, I have something a bit different!

The Wardrobe Architect

I’m following along with the Wardrobe Architect project, led by Sarai over at the Coletterie blog. (Here is the very first post in the series, explaining what the project is all about. You can check out all the posts about the project so far here.)

The point of this project is to think critically about what we wear and why we wear it, so as to be able to sew (and buy) garments that we will actually use and be happy to wear, rather than garments that end up perpetually hanging in the back of the closet, unworn and unloved. What kinds of clothes make us feel good about ourselves or our bodies, and why? What kinds of clothes make us feel uncomfortable? What garments do we like in theory (or on other people), but never seem to actually wear? What shaped these preferences? How does one define a core personal style, or aesthetic?

Sarai has posted some great prompts and worksheets to help us get started thinking about these things (one prompt per week is the plan). The last item on the worksheet for week two was to select five words that define your personal style, and then to collect 15-20 images that reflect those words. My words were casual, modern, subdued-yet-cheerful, practical, and simple. (I know I kind of cheated on the middle one, just roll with it.) I collected my images on a Pinterest board–feel free to peruse it, if you so desire.

I’m not going to share the rest of my answers to the worksheet questions here (too long, too boring, too personal), but here are a few of the more useful thoughts that came to me as I was filling them out:

I want my clothes to help me look like a competent adult. For whatever reason, when people first meet me (and have nothing but my appearance to go on), they often assume I’m several years younger than I actually am. While this isn’t the end of the world (people are forever telling me I’ll be grateful for it eventually!), I would like my appearance to better reflect the reality of the situation.

I’d like to look “effortlessly put-together.” I want it to look like I put some thought into what I’m wearing, but not like I obsessed about it. Plus, although I like looking good as much as the next person, I know that I’m way more likely to wear things that are “easy to wear.” If it requires a lot of maintenance, special undergarments, a special hair-do, impractical shoes, or what-have-you, it probably won’t be on heavy rotation in my everyday wardrobe.

Unique details are good; super quirky and weird usually isn’t (for me, right now). When I was younger I was way more into looking purposefully quirky/weird, and steadfastly not following trends. These days, I don’t mind fitting in a little bit more.

Although I like vintage looks on other people, I (mostly) don’t feel comfortable sporting that look myself. Wearing things that are so far outside my usual “skinny jeans and a nice top” uniform in my everyday life usually just makes me feel self-conscious and uncomfortable. (For special occasions, though, all bets are off.)

I need my everyday clothes to be comfortable and practical. If I can’t comfortably walk moderate distances, bend over, and sit cross-legged on the ground in it, then I probably won’t wear it super often. (Again, though, this does not apply to special occasions!)

Clean lines and simple designs tend to appeal to me. I should really try to embrace this more in the garments I sew.

I feel the most attractive and comfortable in subdued-but-cheerful colors. No neons, not all black. Colors like cranberry red, peacock blue, olive green, burnt orange, dusty pink, dark lavender, and mustard yellow. (I guess most of these are “autumn” colors.) I think they look good on me, too. My favorite garments in my closet at the moment are almost all in this color pallet. I’m also kind of getting into gray as a neutral these days–it’s less harsh than black.

That’s it for today. I recommend playing along, if you’re interested in thinking a little bit more deeply than usual about your fashion preferences and choices. But even if you aren’t, go and read Sarai’s posts and skim the comments–lots of great inspiration and food for thought!

P.S. If you made it all the way through that wall of text, thanks for reading. :)

Blue Batwing Top

IMG_3441

I made another knit top! (Also, my mom gave me a set of 100 of these awesome-sauce labels for Christmas, and I freaking love them. They look so professional! I’m putting them in everything I make from now on, haha.)

IMG_3431

I drafted this pattern myself (if you can even call this drafting–it was incredibly simple). It’s based on a RTW (ready-to-wear) top I already own and like, with a few simple modifications. I raised the neckline quite a bit, and made my version longer, for a more tunic-y effect.

IMG_3436

IMG_3433

IMG_3435

This fabric is amazing and gorgeous. I wish a remembered the fiber content, but I don’t. All I know is that I found it in the sweater knit section at Stone Mountain and Daughter and decided I had to have it. It’s incredible drapey and soft (and also slightly see-through, so this is definitely in the “only wearable with a cami underneath” category, but that’s okay).

IMG_3452

Construction was simple. I used a normal narrow zig zag (width 1.5, length 2.5) to sew the seams. I used French seams on the side seams and shoulder seams, to enclose the raw edges (I wanted the inside to look nice and clean, since the fabric is slightly sheer). I used the overcasting stitch on my sewing machine to finish the seams attaching the neck band, cuffs, and hem band, and then zig-zagged those edges in place so they would roll the right direction. (I used this tutorial for the Hemlock Tee from Grainline Studio to figure out how to attach the neck band.)

IMG_3434

Here’s the inside of the hem band:
IMG_3459

The outside of the hem band:
IMG_3451

The inside of the neck band, with a shoulder seam:
IMG_3456

A cuff:
IMG_3454

I’m really happy with how this turned out.

IMG_3447

It’s super comfy, and I love that it looks good both with jeans and tucked into skirts. See? (Disclaimer: I did NOT make that pencil skirt. It’s just for demonstration purposes!)

IMG_3426

IMG_3430

I know I’ll get lots of wear out of this, and I’m already looking forward to making more batwing tops in cozy knits. :)

On a different topic: I’m participating in my first official Sewcialist project with other sewing bloggers! We’re going to be sewing button down shirts together, sharing tips, advice, and inspiration as we go. Check out the website for the project here: http://itsonlikedonkeykongsshirt.tumblr.com.

Edited to add: I’m also going to try to follow along with the Wardrobe Architect project over on the Coletterie blog. Yay!

Cranberry Renfrew

I made my first Sewaholic Renfrew top! I can see why everyone raves about this pattern so much; it really is pretty excellent.

IMG_3390

I’m so pleased with how this turned out. It’s super cozy, and it looks quite nice too!

IMG_3391

This pattern is very well drafted and went together very easily. I made view C, with the cowl neck and 3/4 length sleeves. Tasia’s instructions are, once again, fabulous, and give the shirt a very neat and professional finish. I especially love that you can easily make this top using either a regular sewing machine or a serger (or a combination of the two). I made the whole thing with my sewing machine.

IMG_3407

I finally learned how to use my machine’s overcasting stitch to finish my seam allowances. I think it looks pretty good!

IMG_3414

Mainly for my own information, since I will inevitably forget this and have to look it up when I go to make my next Renfrew (and there WILL be a next Renfrew, this pattern is THAT good), I sewed the seams with a regular zigzag stitch with length 1 and width 2, and finished the seam allowances with the overcasting stitch using whatever the automatic length and width are for that stitch on my machine.

IMG_3416

The pattern calls for twill tape to stabilize the shoulder seams, but I didn’t have any on hand. I used some sturdy ribbon I happened to have in my stash instead, and it worked perfectly. I kind of like having this secret bit of green on the inside, too. :)

IMG_3396

I cut a straight size 10 based on my upper bust measurement, and it fits pretty well! I didn’t even take in the hips, except for sewing the bottom hem band with quite generous seam allowances to tighten it up just a little. The fit from the waist down did turn out slightly more relaxed and slouchy than I was envisioning, but I don’t actually mind–it’s definitely comfy, and I think it looks okay. I think I might try a size 8 next time though (maybe even grading down to a 6 below the waist), especially if I make a non-cowl-necked version where neckline gaping might be an issue… We’ll see.

IMG_3386

The only substantial adjustment I made was to tighten the cuffs quite a bit. I don’t know if I just have skinny arms or what, but they were kind of ridiculously loose on me as drafted. Taking them in was super easy though, so no big deal.

IMG_3393

I love this fabric too. It’s from Stone Mountain and Daughter, and it’s a lovely, warm, cranberry red color. It’s super soft, too. I don’t actually remember the fiber content, but I have a feeling it might be bamboo or something–it feels softer and smoother than cotton.

IMG_3388

Overall I’m really happy with this make. I see many more Renfrews in my future! Must get my hands on some more cozy knits… :)

——-

Oh, also: I finally got around to making an account on Bloglovin’ and claiming my blog over there… So now you can follow me over there if you want to!

Follow my blog with Bloglovin